Download Disk Wipe Software (Portable) for Windows PC
In this article, we will explore the benefits of Disk Wipe Software and provide you with a step-by-step guide on how to use it effectively.
In our digital age, data security is of paramount importance. Whether you’re a business owner, a student, or simply someone who values privacy, it’s crucial to ensure that your sensitive information is thoroughly erased from your devices. One powerful tool that can help you achieve this is Disk Wipe.
In a world where data privacy is a growing concern, Disk Wipe emerges as a robust solution for securely wiping data from storage devices. By following the step-by-step guide outlined in this article, you can confidently protect your sensitive information from falling into the wrong hands.
Understanding Disk Wipe:
Disk Wipe is a software application designed to permanently erase data from storage devices such as hard drives, solid-state drives (SSDs), and USB drives. Unlike simple file deletion or formatting, Disk Wipe employs advanced algorithms to overwrite the data multiple times, making it virtually unrecoverable by any means.
It is free software and easy to use. It scans your computer for traces of already deleted files and lets you securely erase them to prevent recovery using any data recovery software. Before wiping, remember to exercise caution and always double-check your actions when using Disk Wipe to ensure that you target the correct drives.
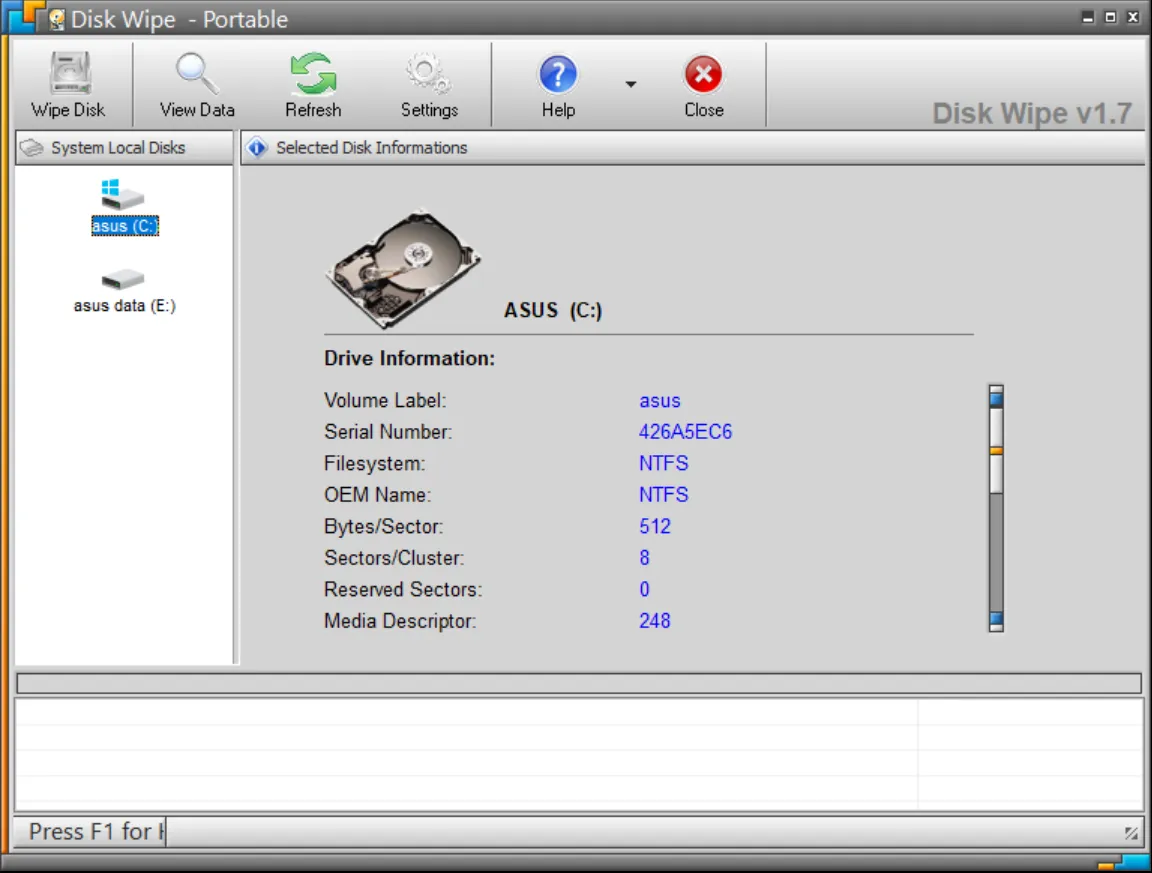
User-friendly interface, for every individual who has zero technical skills.
Effectively erases sensitive data from partitions and drives.
No need for installation, it’s portable!
Utilizes multiple advanced data-wiping algorithms to ensure secure deletion.
Compatible with all widely-used Windows file systems, including NTFS, FAT, and FAT32.
It uses a quick format before initiating the disk-wiping process for performance speed.
Supports USB Devices, SD cards, and other devices.
Step-by-Step Guide to Using Disk Wipe Software:
Download and Install Disk Wipe:
Download the Disk Wipe portable version from its official website or from the link given below. No need for installation, it’s portable.
Select the Drive to Wipe:
Launch Disk Wipe and you will be presented with a list of available drives. Carefully choose the drive that you want to wipe. It is crucial to double-check this step to avoid accidentally wiping the wrong drive.
Choose the Wiping Method:
Disk Wipe offers several wiping methods, each with varying levels of security. The most commonly used method is the “Gutmann Method” which overwrites data 35 times. For standard use, this method provides an excellent balance between security and efficiency. However, if you require a faster wipe, you can choose a less secure method.
Once you have selected the drive and wiping method, click on the “Start” button to initiate the wiping process. Depending on the size of the drive and the chosen method, this process may take some time. It is important to remain patient and avoid interrupting the process.
Verification:
After the wiping process is complete, Disk Wipe will provide a verification report to ensure that all data has been successfully erased. This step adds an extra layer of confidence in the effectiveness of the wipe.
Disclaimer: It is important to note that Disk Wipe permanently deletes data and cannot be undone. Always make sure to create proper backups of any important files before using Disk Wipe.

 Download for Windows PC")
%22%20transform%3D%22translate(.5%20.5)%22%20fill-opacity%3D%22.5%22%3E%3Cellipse%20fill%3D%22%23d2d2d2%22%20rx%3D%221%22%20ry%3D%221%22%20transform%3D%22matrix(-3.78773%2039.85186%20-86.03396%20-8.17712%2071.4%200)%22%2F%3E%3Cellipse%20fill%3D%22%23979797%22%20cx%3D%2271%22%20cy%3D%2279%22%20rx%3D%22149%22%20ry%3D%2240%22%2F%3E%3Cpath%20fill%3D%22%23838383%22%20d%3D%22M55.9-7.1l40-.7.2%2015-40%20.6z%22%2F%3E%3Cpath%20fill%3D%22%23959595%22%20d%3D%22M0%2024h24v19H0z%22%2F%3E%3C%2Fg%3E%3C%2Fsvg%3E "Download UltraDefrag Defragmenter for Windows PC")


")


 Download for Windows PC")


")


 Previous Post
 Next Post